piBo Maker
piBo Maker is the piBo development environment you open in a web browser. When your tablet or laptop is on the same WiFi as piBo, type piBo’s IP address (shown on piBo’s screen) into the address bar. There is nothing to install.
Screen |
What it does |
Where to open it |
|---|---|---|
IDE |
Build and run programs with blocks or Python |
|
Tools |
Try the motors, camera and voice right away, without code |
[Tools] at the top of the IDE |
Chat |
Chat in text with the language model (LLM) running inside piBo |
[Chat] at the top of the IDE |
Classifier |
Collect examples with the camera and teach your own AI |
[Classifier] at the top of the IDE |
Guide |
This document |
[Guide] at the top of the IDE |
Note
Everything runs inside piBo (voices, speech recognition, chat and the classifier included). Only the blocks in the [Collect] category (Wikipedia, weather, news) need the internet, and that category is only in the Korean edition.
IDE
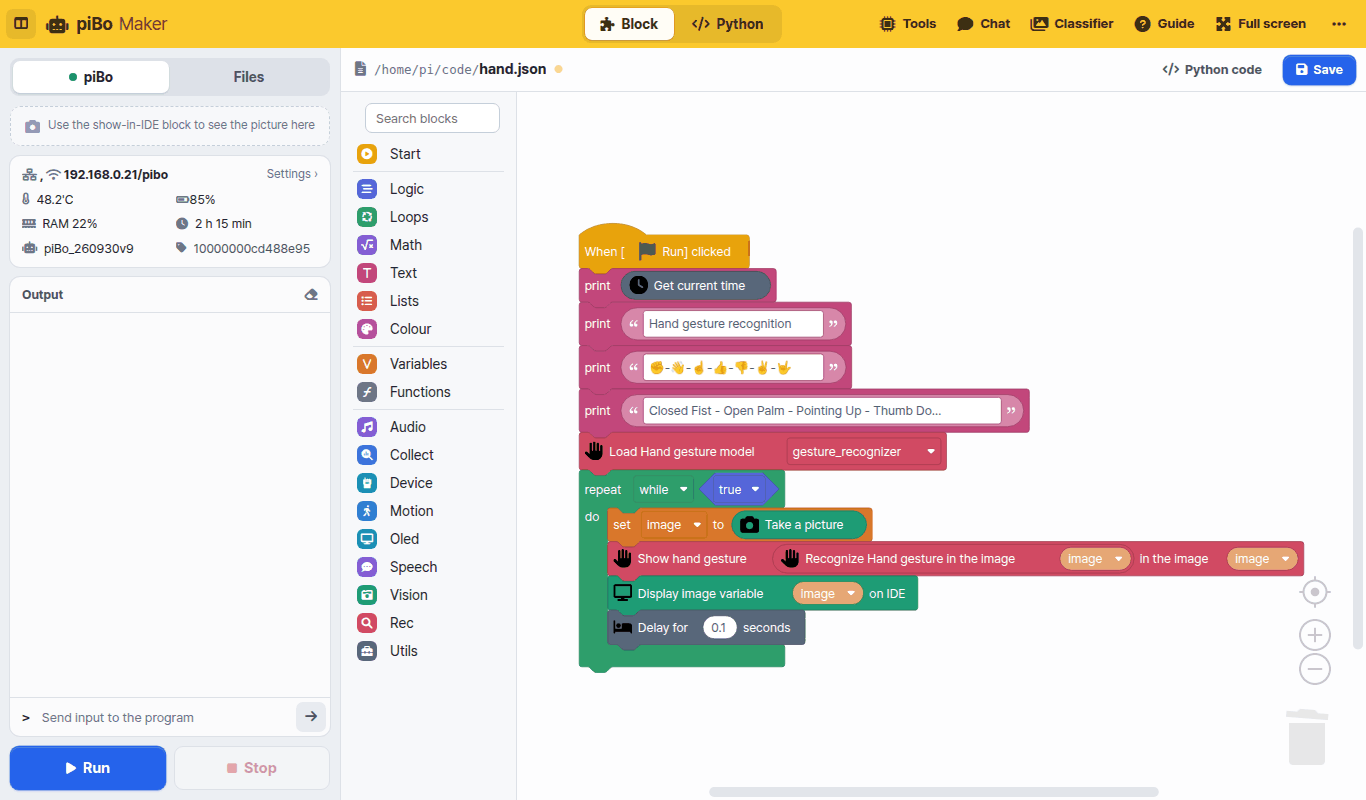
Top bar: switch the editor with [Block | Python]. On the right are Tools, Chat, Classifier, Guide, Full screen and [⋯] More (brightness · font size · Python editor theme · language · reset · power · source code and license)
Left panel: [Run] [Stop] at the bottom are always visible.
[piBo] — screen output (pictures sent with the
Display image variable … on IDEblock), status (WiFi, temperature, battery, memory, uptime, version), program output, sending input to the program[Files] — the file list, new file / new folder / upload, and a preview for pictures and sounds
Blocks: drag blocks out of the categories on the left. Type a word such as “sound” or “face” into Search blocks at the top to find blocks. [Python code] shows the Python code your blocks make. See Blocks on the left for every block.
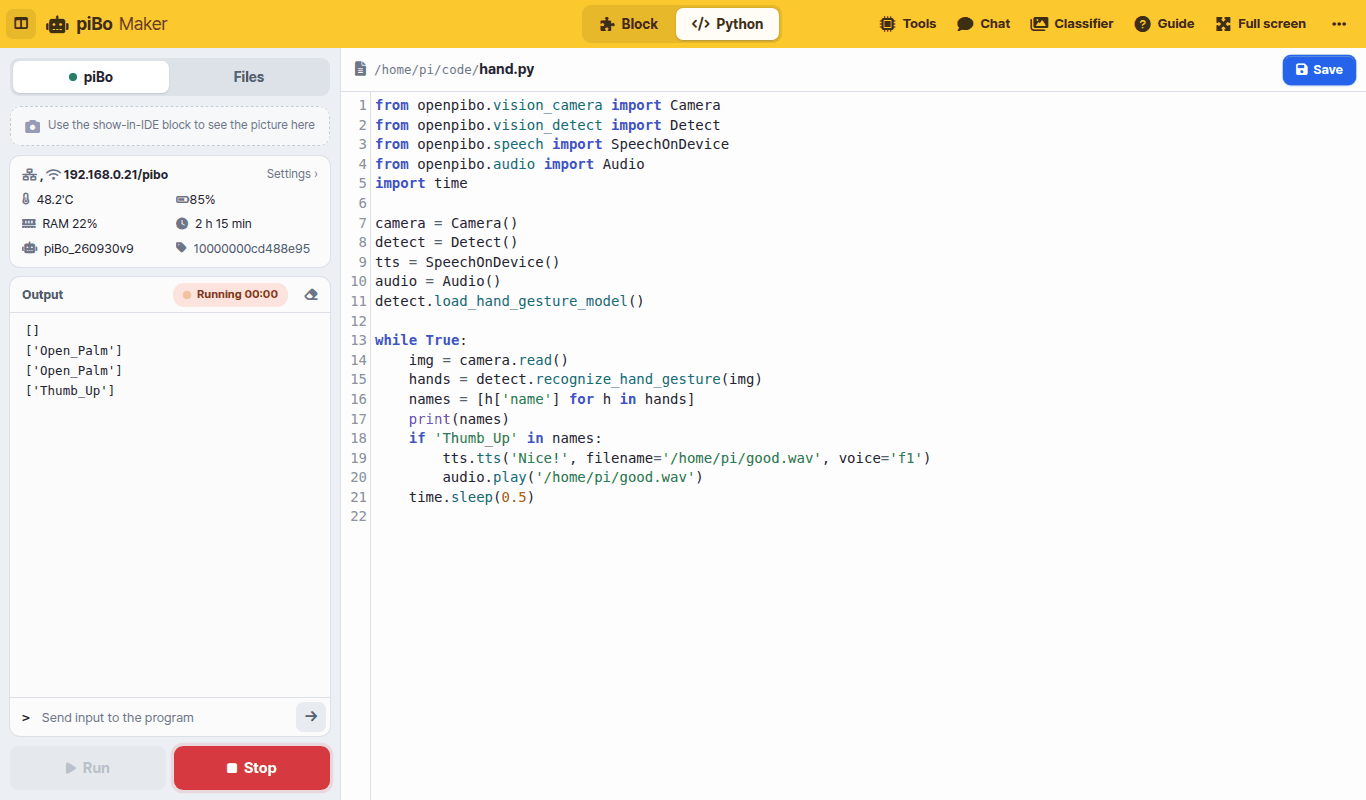
Python: the
openpibopackage gives you every piBo feature.printgoes to [Output] on the left andinputreads from the input box. See Python on the left for the APIPrograms run inside piBo. Press [Stop] to stop one
Tools
Try piBo’s features one at a time, without code. Pick [Motion], [Camera] or [Speech] on the left.
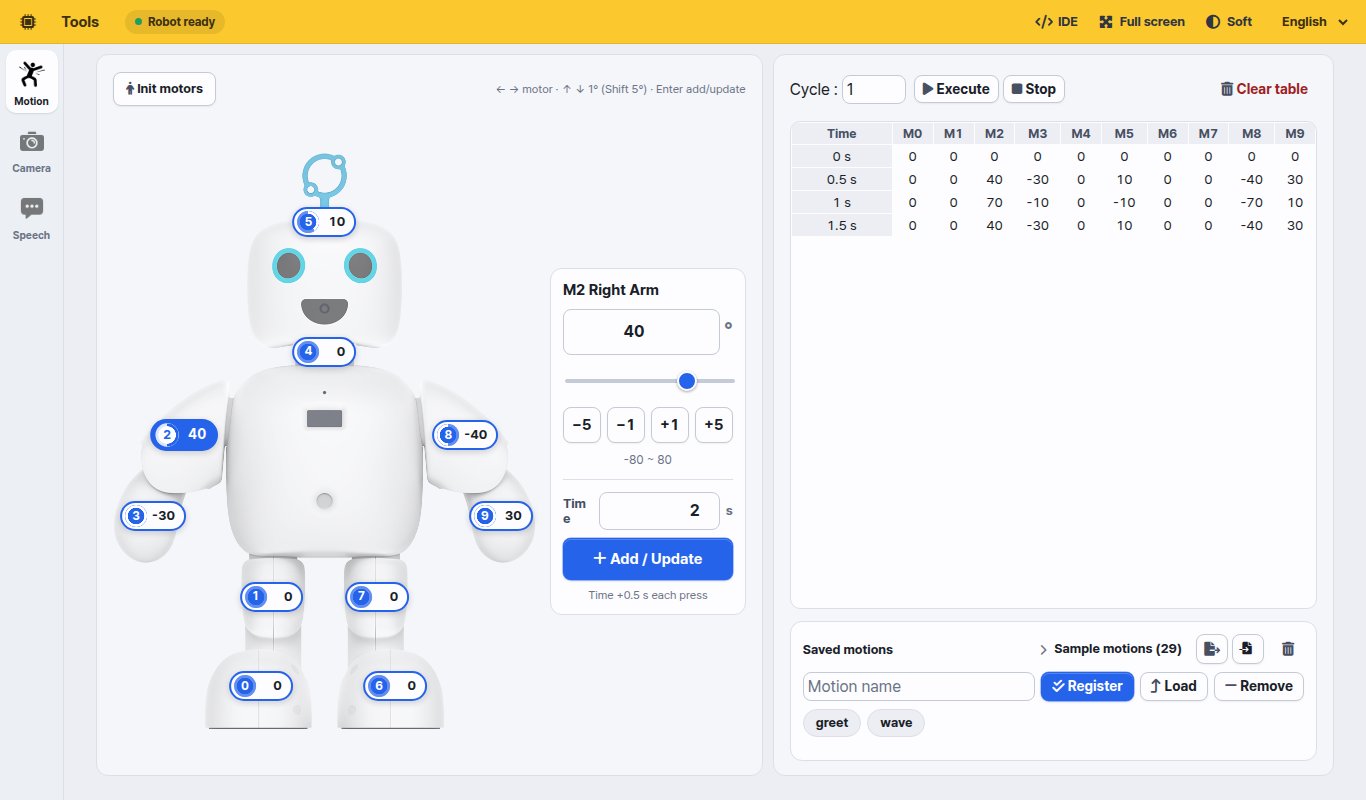
Motion: tap a number on the photo to pick a motor, set its angle in the panel next to it and press [Add / Update] to add a row to the table on the right (the time goes up by 0.5 s each time). [Execute] plays the table; give it a name and press [Register] to use it later with the
Execute my motion … timesblock. On a laptop: ←→ picks the motor, ↑↓ changes the angle, Enter adds or updates
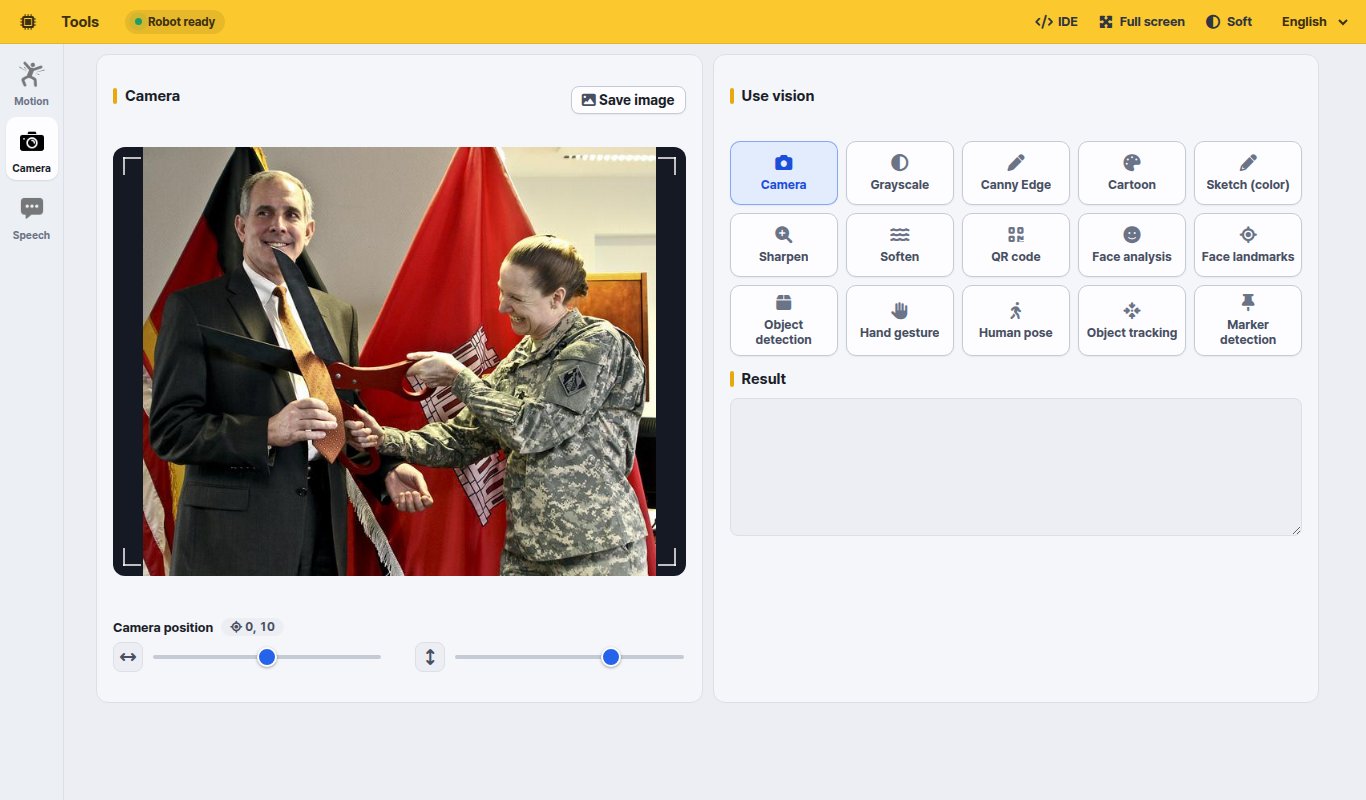
Camera: apply vision features (grayscale, edges, cartoon, QR code, face analysis, object detection, hand gestures, pose, markers…) to piBo’s camera view. The result also appears as text under [Result]
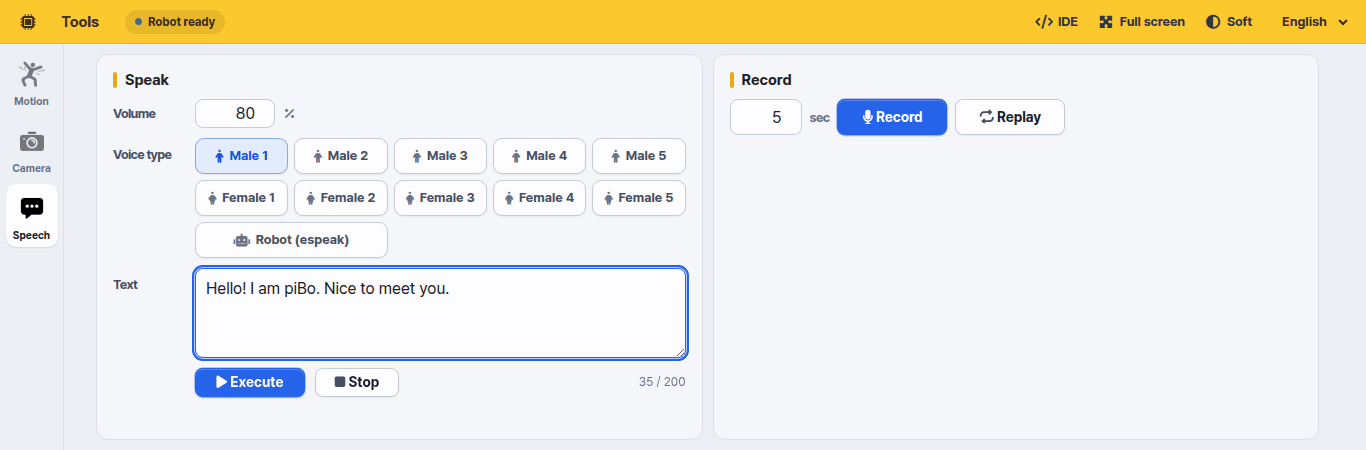
Speech: pick one of ten voices (Male 1–5, Female 1–5) or the robot voice (espeak) and let piBo say your text. Korean and English are detected automatically. [Record] records piBo’s microphone and [Replay] plays it back
Classifier
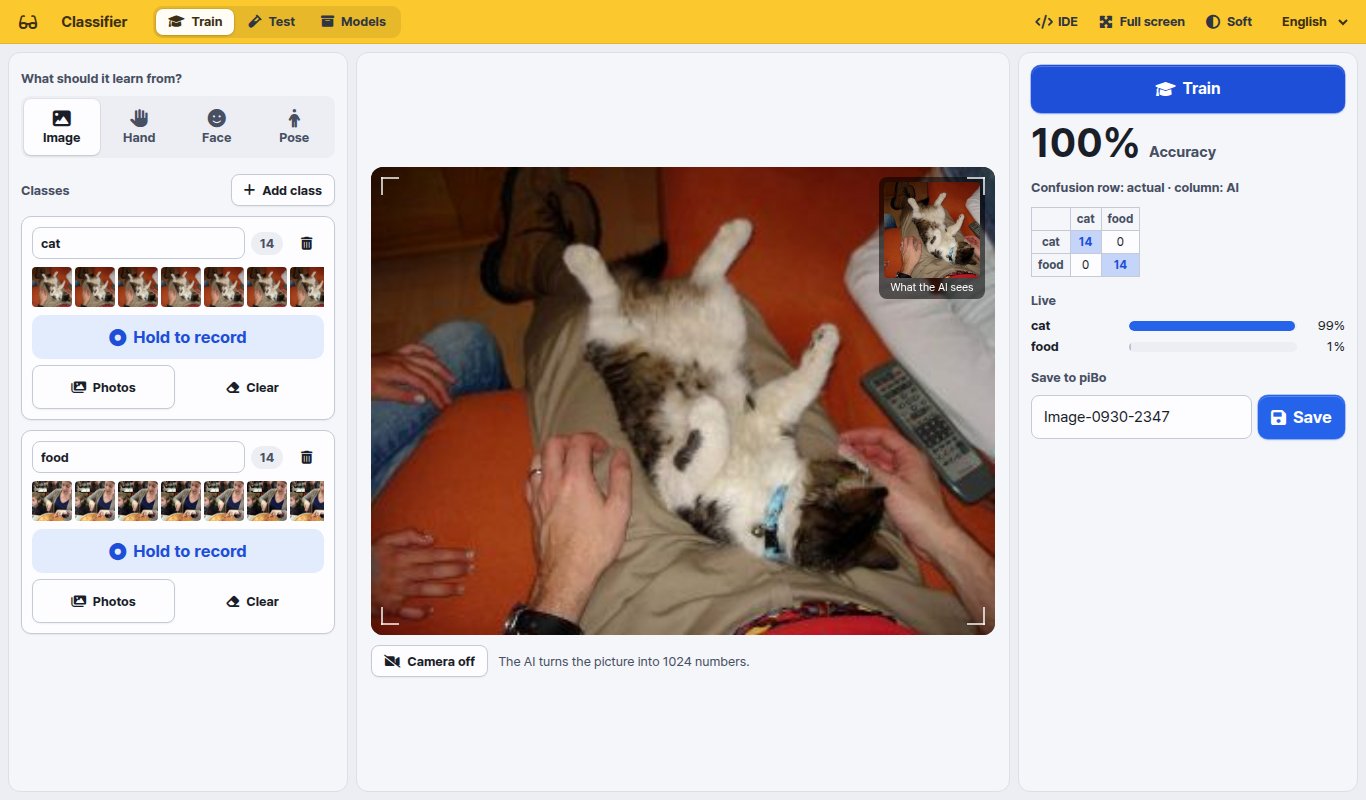
Collect examples with the camera and teach the AI, for example “this is a cat, this is food”.
What should it learn from? — Image (the whole picture) · Hand (hand shape) · Face (expression) · Pose (body posture)
Name each class and keep pressing [Hold to record] to collect examples. You can also upload files with [Photos]
[Train] — the tablet or laptop browser learns in a few seconds and shows the accuracy, a confusion table and live scores
[Save] (under Save to piBo) — saved on piBo in
/home/pi/mymodel/<model name>In the IDE use
Load classifier model (mymodel) (model name)→Classify (image) with classifier model.Draw what the classifier saw on imagedraws the hand, face or body points and the class name on the picture
The [Test] tab tries a saved model again. [Models] lets you test, keep training, rename, download (zip) or delete a model.
Tip
The classifier downloads its AI files (about 10 MB) the first time it opens. Open it once on every tablet before class and it will start right away during class.
Chat
Chat in text with the language model (LLM) that runs inside piBo. Programs can use it too, with the Start LLM server and
Respond to … blocks in [Speech]. Loading the model takes a while, so the first time you open it a waiting screen appears until it is ready.
Note
Tools, Chat and Classifier run one at a time. Opening one closes the others, and running a program in the IDE closes them too (they share the camera, speaker and memory). A closed screen shows [Restart].